Sunday, October 7, 2012

Jalapeno and Bacon Stuffed Chicken Breasts and a Recipe Album


Hi all!

I just recently finished an album for a friend filled with some of my favorite low-carb recipes as well as space for her to add some of her own. I used the Echo Park Digital Paper pack #1 as well as one of the digital element packs and printed my own papers scaled down to a 6"x6" size. I used heavy chipboard covers and then mixed the pages up a bit. Some pages are a double sided cardstock and some are paper bags so that there would be pockets for adding recipes and such. I also added in a little brown bag that my sweet husband saved for me from the hardware store. It measures approximately 3.5"x5"and perfectly holds the 3 journaling tags I put in it for her to write her own recipes.


I also wanted to share one of the yummiest chicken dishes I have come up with. I'm sure it's been done before because it's a pretty classic combination of flavors, but I still feel pretty creative coming up with it on my own.  First off, I have to say that the inspiration came from this YUMMY snack/appetizer that I found on Pinterest. The recipe is for grilled bacon jalapeno wraps and comes from allrecipes.com. It is one of the easiest and yummiest things we have ever tasted and they have become a new staple.


So, knowing that we couldn't truly make a meal out of these, I decided to use the same ingredients inside a chicken breast. Mmmmm....sooooo good! And easy!

Jalapeno Stuffed Chicken Breasts

  • 4 Chicken breasts, butterflied
  • 4 strips of bacon, cooked and crumbled
  • 4 Tbl of cream cheese or Neufchatel
  • 2-4 Jalapeno peppers depending on size or taste, diced or sliced into rings
  • Olive Oil
  • salt
  1. Preheat oven to 350 degrees.
  2. Drizzle Olive Oil in a shallow baking dish.
  3. Rinse chicken, pat dry and butterfly.
  4. Spread 1 Tbl cream cheese on one side of the chicken breast and add equal portions of pepper and bacon. Fold the chicken breast back over the filling and lay in the baking dish. 
  5. Drizzle some more olive oil over the tops of the breasts and add salt to taste.
  6. Bake for 30-35 minutes or until chicken is cooked through.
Sorry! I don't have pictures, but you don't need pictures to know this one is gonna be good!

Also, just a tip for those who have not handled hot peppers before. Make sure to wear gloves while slicing and dicing your peppers. You can use your rubber dish gloves. If you have nothing, make sure to thoroughly wash your hands before touching your eyes! Trust me! You don't want to find out why, just do it! : ) Also, if you want just a mild pepper flavor, make sure to remove the seeds and ribs from your pepper before dicing. If you want a full, hot pepper flavor, simply slice your peppers, leaving seeds and ribs intact and place inside breasts. This is how we prefer it and it is really good!

Enjoy!


Follow Me on Pinterest

Monday, September 24, 2012

The last 4 months

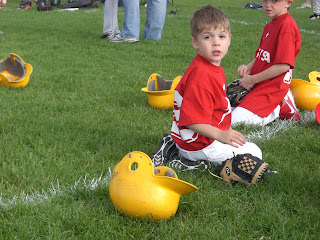
Wow! I haven't posted for 4 months and am now composing my 4th entry for the day! Hopefully I can stay caught up a little. This post is just a little photo recap of what we've been doing this summer. We've celebrated three birthdays, including mine, went camping, set up a "new to us" Rainbow play systems swing set in our backyard, played t-ball, lived, loved, laughed and sent our oldest off to school for the first time! It has been an eventful 4 months and it seems as though time is flying by.

Before our "new" old swing set.


After
Ladies' climbing night at REI

My 3 year old did awesome! I was so proud!

Getting back into it after several years! It felt good!
Up to bat


Elliot's 5th Birthday. Ian's got his eyes on that cake!

I added a new piece to my Etsy Store.

Camping at Lake Gillette

Hiking at Priest Lake

3 miles in and we still got them to smile!


Home made birthday cake with pink, buttercream frosting. Yummy!

Celebrating Karis' 2nd birthday. Look at that face!


My beautiful kiddos!

My beautiful family! I am so blessed!


Follow Me on Pinterest

Halloween Wreath

Well, it's that time of year! The leaves start to fall and there's a chill in the air. It gets darker earlier and we stock up on CANDY! Yep, it's almost Halloween and this year I got an itch to create a Halloween wreath for the front door. I had to convince my hubby to let me spend the money to make one and so I had to do a little begging and borrowing. I used patterned papers from Echo Park's Apothecary Emporium collection that I had bought last year, Tim Holtz Distress Ink in Black Soot, a little spanish moss, 4" wood letters, MS glitter in Crystal , some plastic, black bugs from the dollar store, an 18" grapevine wreath, some flat, black spray paint and an orange/black lace printed satin ribbon. That sounds like a lot, but it only cost me $9! Ok, so I already had the paper and the ink and I made the rosettes with my MS score board and paper punches, which I already had. I covered the wood letters with paper and gave them a coat of Mod Podge, again which I already had, and then sprinkled on some glitter. So, I didn't add in the cost of those already purchased items, but if you had to buy rosettes, you would probably spend an additional $5 to $7. Mod Podge is pricey, but you can make your own. There's a great tutorial here. I also borrowed some spray paint from my lovely friend, Mary. I ran out, quickly, of the flat black and so I finished with chalkboard spray paint which works just as well and gives it a slight satin like finish, which I like. My hubby informed me of the fact that they have $1 cans of white or black spray paint at Home Depot. So, either way, it wouldn't have been what I expected to pay ($5.99) for a can of paint at the craft store. So, here's the break down:

Wreath $3.99 + 50% off @ Joann Fabrics
Paint     Free
Wood Letters $1.47/2 pack of the same letter = $3 + 40% off @ Hobby Lobby
Plastic Bugs $1 @ Dollar Tree
Ribbon $3.99 + 50% off @ Joann Fabrics
Spanish Moss $1 @ Dollar Tree

And here's the wreath!


I have yet to get some adhesive for my hook for the front door. When I do, I'll post photos of the front of the house. Since hanging our new front door, I am excited to try a new way of hanging my wreath that I saw on Pinterest. It is credited to a cute little blog named Lemonade. Check it out here. Speaking of new front doors, here is a photo of ours. We moved in 3 years ago and have a long list of  "To Dos". I think it turned out pretty nice!

Here is a view from the inside.

The view from the outside prior to adding the new screen door.

Here it is after adding the screen. Next up, black shutters and some more plants!


Follow Me on Pinterest

Sisters Mini TP Album

Hello! I want to share some photos of a fun, little toilet paper roll mini album I made for a sweet, sweet friend of my sister's who is expecting her second girl in just a few weeks. Her name is Heather and she and her husband have been praying and waiting for this new addition for quite some time. Their first daughter, now 5, was just as long awaited and this new life is such a huge answer to prayer and such a blessing!  I wanted her to have a fun place to keep some cute photos of her girls together. I love having two girls and love knowing that they will always have each other. My sister and I are separated by coasts, I on the West and she on the East, and it's hard to be so far away, but we are very close. She's always been there for me, even if it was just emotionally and spiritually and not physically. So, Heather, enjoy your girls and nurture a great friendship between them. This is for you!!!

I used Basic Grey's 6x6 Serendipity paper pad. These are super fun papers and I love the colors!

I inked the edges with Tim Holtz Distress Ink in Wild Honey.


There are 3 book style mats, each cut 2.25"x2.25" for a total of 9, 2" photos, if desired.


Each page creates a pocket, accommodating 4 pull out tags for journaling or additional photos.


This is a photo of my beautiful sister, Heather (yes, she's a Heather too!). It's hard to believe that it's been a year since I saw my sister last! I miss her! 

Love you!


Follow Me on Pinterest

Hooray for Fall!

So it's been a while. A LONG while since I posted last. I've been busy and to be honest, am not much of a writer. I have always admired those who can sit down and eloquently put words to paper and get so much fulfillment from it. My sister is a fabulous writer. She always has been and I was always a little jealous. That being said, I am now attempting an eloquent, yet amusing entry.

First off, I have to admit that I have not felt very creative lately. I don't know if it's because of the busy-ness or because I haven't been inspired by anything. My oldest started Kindergarten this year and it has been a whirlwind. By the time I do have time to myself, I want to sit down and do nothing! I have, however, completed several different projects and am hoping that the mojo returns. I recently completed a couple paper mache monograms for friends' children's rooms, but failed to photograph them. Really?! One of them was for a friend who is due with her 3rd child in less than 3 weeks and needed some nursery decor. I will have to request a photo shoot with both recipients and post them at a later date. They both turned out so cute!

I have also finished a couple mini albums. One of them was also for this same friend who is having a little girl. So, I put together a mini paper bag album using Crate Paper's Pretty Party Collection. I love Crate Paper and I love this paper! It is so sweet! I just finished this album late, last night, so I have not yet added ribbon to the binding.


I am really excited about giving this album to my girlfriend. I hope she enjoys it and I can't wait to see it with photos of her little one in it!

This post wouldn't be complete without a photo of my son, Elliot on his first day of school. I will post the other projects in separate entries. I hope everyone enjoys fall as much as I know I will! It's my favorite season! Put on your sweaters and cozy socks and get creative! : )


Follow Me on Pinterest